一. 简述
针对基于 SpringBoot 构建的微服务项目(当然也可以是普通项目),我们可以通过 SpringBoot 官方提供的 spring-boot-starter-actuator 套件进行监控。但是这个套件有个问题,就是只有 HTTP 接口可以调用,如果我们需要可视化的监控界面,则需要配置 ELK 或者其他的后台管理系统调用这个接口获取系统的信息。 当然,还有一种解决方案就是使用 spring-boot-admin 这个项目来监控我们的微服务系统,这是一个开源的项目,用起来还是蛮舒服的,所以在这里推荐大家可以用一用。 spring-boot-admin 有两种方式可以集成到系统中,一种是使用 spring-cloud 的服务发现,另外一种是直接配置监控的服务地址,这样 admin 服务即可接收到我们配置的系统的一些信息和快照了。 由于这里还不涉及 spring-cloud 所以这里先使用我们自己的服务集成 admin-client 的方式来集成系统监控。
二. 开发
(一) spring-boot-admin 服务端的搭建
1.mvn依赖:
1
2
3
4
5
6
7
8
9
10
11
12
| <dependencies>
<!-- 注意:admin-server的版本号要和spring-boot的版本号对应起来,不然会出现错误 -->
<dependency>
<groupId>de.codecentric</groupId>
<artifactId>spring-boot-admin-starter-server</artifactId>
<version>2.1.0</version>
</dependency>
<dependency>
<groupId>org.springframework.boot</groupId>
<artifactId>spring-boot-starter-web</artifactId>
</dependency>
</dependencies>
|
2.启动器编写
1
2
3
4
5
6
7
8
9
| @SpringBootApplication
@EnableAdminServer
public class AdminServerApplication {
public static void main(String[] args) {
SpringApplication.run(AdminServerApplication.class, args);
}
}
|
3.配置文件 application.yml
只配置了 8081 端口启动服务端,后面客户端需要用到这个端口,才能正确收集数据。
(二)spring-boot-admin 客户端集成到 springboot 项目
1.mvn依赖
1
2
3
4
5
6
7
8
9
10
11
12
13
14
15
| <dependencies>
<dependency>
<groupId>org.springframework.boot</groupId>
<artifactId>spring-boot-starter-web</artifactId>
</dependency>
<dependency>
<groupId>de.codecentric</groupId>
<artifactId>spring-boot-admin-starter-client</artifactId>
<version>2.1.0</version>
</dependency>
<dependency>
<groupId>org.springframework.boot</groupId>
<artifactId>spring-boot-starter-security</artifactId>
</dependency>
</dependencies>
|
2.启动器编写
因为是在起步中,所以安全措施什么的,先不设置任何东西,后面需要整合的时候才做修改。
1
2
3
4
5
6
7
8
9
10
11
12
13
14
15
16
17
18
| @SpringBootApplication
public class AdminClientApplication {
@Configuration
public static class SecurityPermitAllConfig extends WebSecurityConfigurerAdapter {
@Override
protected void configure(HttpSecurity http) throws Exception {
http.authorizeRequests().anyRequest().permitAll()
.and().csrf().disable();
}
}
public static void main(String[] args) {
SpringApplication.run(AdminClientApplication.class, args);
}
}
|
3.配置文件application.yml
1
2
3
4
5
6
7
8
9
10
11
12
| server:
port: 8082
spring:
boot:
admin:
client:
url: http://localhost:8081/
management:
endpoints:
web:
exposure:
include: ['*']
|
同上,配置都是最简单的配置,整合起来先。暴露了所有安全相关的端口以及配置了一个 admin-server 的地址,让他可以发送相关信息给服务端。
三. 测试
打开服务端的地址:http://localhost:8081
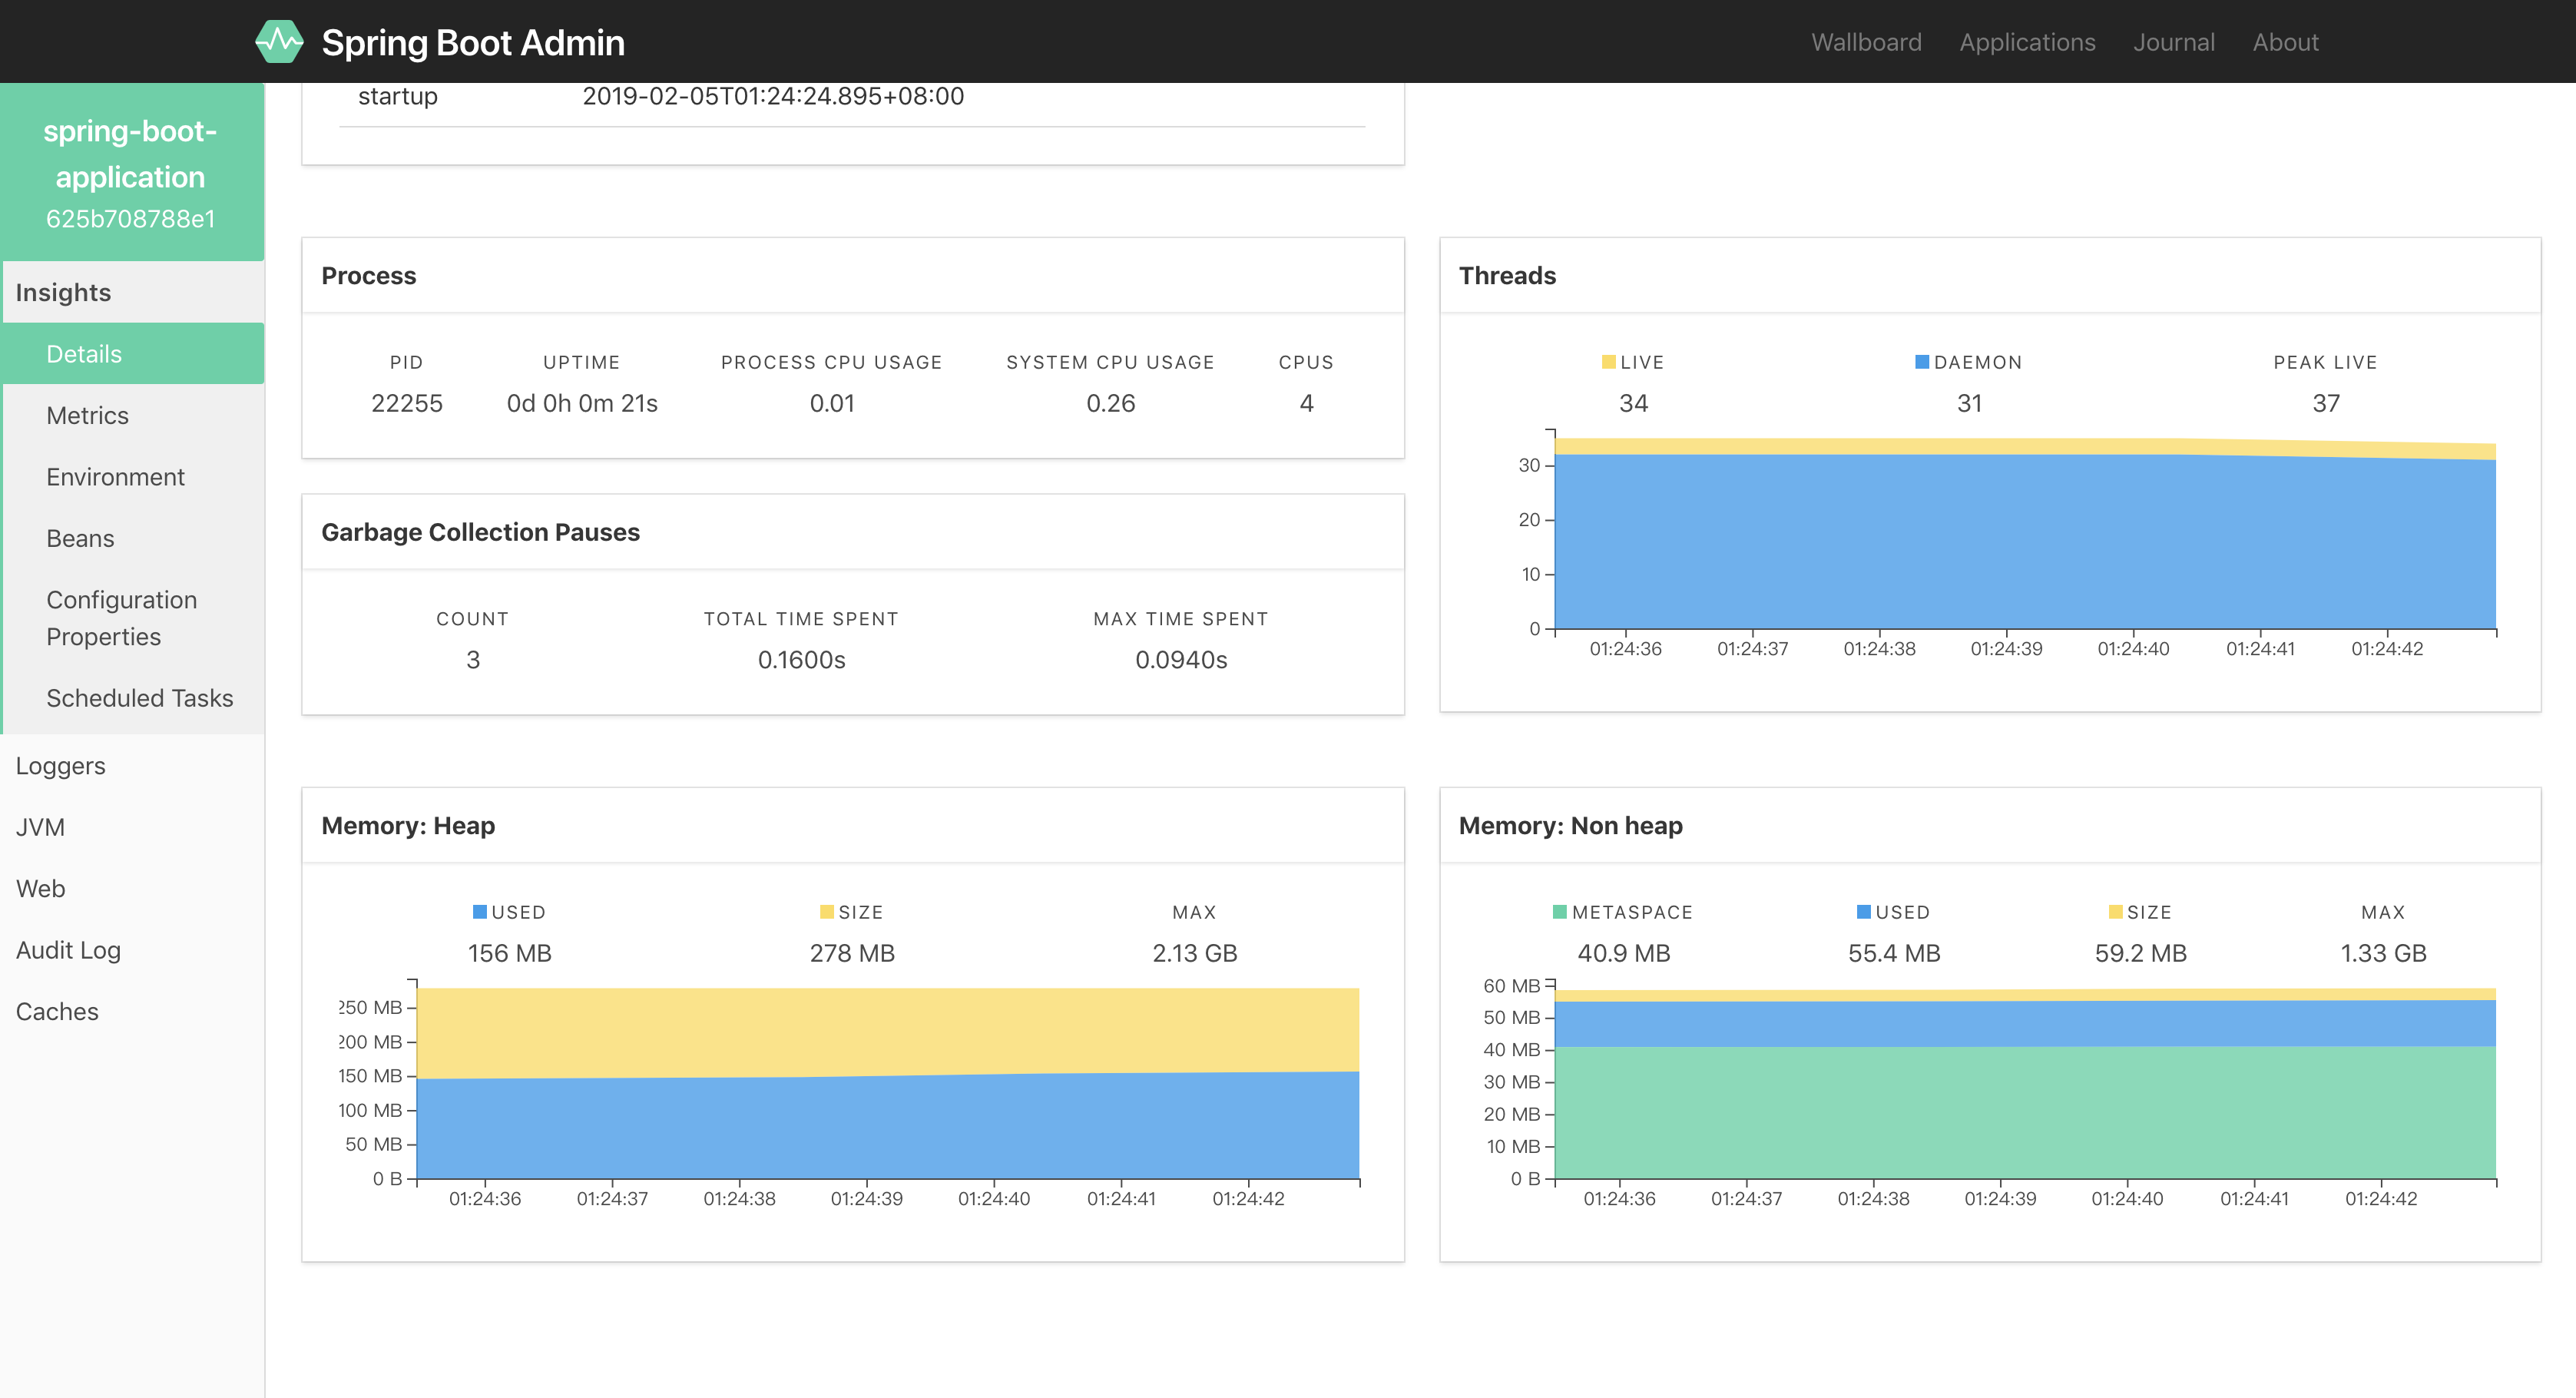
可见,spring-boot-admin 已经显示了我们当前启动的系统的一些信息,包括 jvm 的信息,以及一些日志的情况,可以动态设置我们打印日志的一些等级等等。当然后面如果使用了 spring-cloud 的套件集成进来会更加的容易了。